Reviews on


You spent weeks in Adobe XD getting every artboard, every interaction, every spacing value right. Now the question is: how do you turn those static design files into a live WordPress website that actually performs the way you intended?
There is no export button that produces a working WordPress theme from an XD file. What you are doing is rebuilding the design using HTML, CSS, PHP, and JavaScript, then integrating it into WordPress so non-technical editors can manage content without touching code. The finished product is either a custom WordPress theme or a set of templates built within a page builder, depending on the approach your team chooses.
I have been doing this work at cmsMinds for several years now, across projects ranging from five-page marketing sites to 50+ page corporate platforms with custom post types, ACF block systems, and WooCommerce storefronts.
This guide walks through every step of that process, from preparing design files for developer handoff to choosing and executing the right conversion method. It is the reference I wish I had when I started doing this work.
⏰ 60-Second Summary
- Adobe XD to WordPress is a rebuild, not a file export. A developer writes HTML, CSS, PHP, and JavaScript to reproduce your design as a live, editable WordPress site.
- Adobe XD entered maintenance mode in 2024 and is no longer receiving new features. Convert your finalized XD files now rather than risking expired cloud links.
- Four conversion methods exist: custom HTML/CSS theme, page builder, block theme with theme.json, and automated tools. This guide covers each in detail with honest trade-offs.
- The single biggest handoff mistake is missing responsive layouts. Desktop-only artboards force developers to guess at mobile behavior.
- A proper conversion includes global style setup, responsive cross-browser testing, accessibility checks, SEO foundation, and performance optimization before launch.
Why You Should Convert Your XD Files Now
Adobe stopped active feature development on XD in early 2024, following the collapse of its attempted acquisition of Figma. The tool is in maintenance mode: existing users still have access through Creative Cloud, but no new features are shipping and the product is no longer sold standalone. Plugin support is stagnating, community resources are thinning, and most new design work has shifted to Figma.
From our projects
We have had clients come to us after postponing their conversions. In one case, the designer’s XD cloud links had expired and assets needed to be re-exported from a file untouched for over a year. That added a full day of recovery work. If you have polished XD files ready for development, treat conversion as a priority.
Preparing Your XD Files for Developer Handoff
The quality of your design handoff directly affects how accurate and cost-effective the WordPress build will be. Here is what to get right before sharing your files.
Name everything clearly. Developers reference layer and artboard names when building components. “Group 47” slows everyone down. Use descriptive names: “hero-section,” “testimonial-card,” “footer-nav.” I spend less time guessing intent when layer names tell me what each element does.
Document your design system. Color palette, typography scale, spacing values, reusable components. XD’s design tokens feature generates CSS values developers can reference directly. A defined system translates cleanly into WordPress theme.json or a page builder’s global settings.
Include responsive layouts. Desktop artboards alone are not enough. Provide at minimum desktop and mobile, with tablet as a bonus. Include hover states and any animation notes.
Common mistake: Desktop-only handoff
On a recent project, the designer provided only desktop artboards for a 12-page site. We built responsive layouts based on our best judgment, and the revision round took twice as long as the initial build because the designer’s mobile vision differed from ours. Thirty minutes of mobile artboards would have saved days.
Export assets correctly. SVG for icons and logos. PNG or WebP at 2x for photographic images. Mark assets for export within XD so developers can batch-download them. Optimize images before handoff, not after.
Share a development link. Use XD’s Share for Development feature to expose inspect mode, CSS snippets, dimensions, and downloadable assets. Set the export target to Web.
Four Methods to Convert Adobe XD to WordPress
This is the part that matters most. There is no single right way to go from an XD design to a WordPress site. The best approach depends on your project’s complexity, your budget, and how much control your content team needs over the finished site. Here are the four methods I have used, with the honest trade-offs most guides leave out.
Method 1: Custom HTML/CSS to WordPress Theme
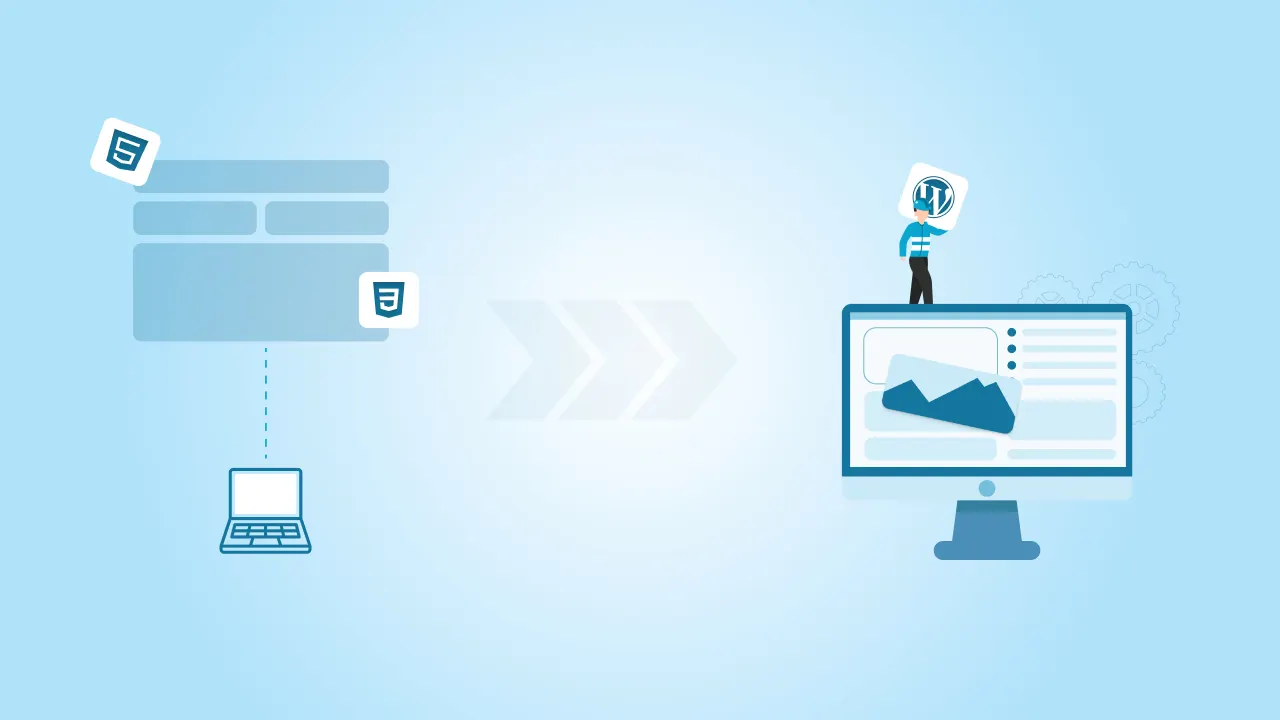
This is the approach we use most often at cmsMinds, and it produces the highest design fidelity. The developer reviews the full XD design (typography, colors, spacing, component patterns) and hand-codes a custom WordPress theme from scratch. Here is how the process actually works, step by step.
Step 1: Review the XD design. Before writing any code, I go through every artboard and document the typography (font families, sizes, weights, line heights), color palette (exact hex values), spacing patterns, and reusable components. I create a shared spreadsheet mapping each XD artboard to its corresponding WordPress template so the full team stays aligned.
Step 2: Set up WordPress and configure the theme. We install WordPress locally (using LocalWP or DDEV), create a custom theme scaffold with the standard template hierarchy (index.php, header.php, footer.php, page.php, single.php, functions.php, style.css), and install required plugins (ACF Pro, SEO plugin, any project-specific dependencies). A child theme is set up if we are building on a starter.
Step 3: Set global styles first. Before touching any page-level code, I define CSS custom properties for colors, typography, buttons, links, and spacing tokens that mirror the XD design system. This is the step most tutorials skip, but it is the one that makes everything else faster. Once these global tokens are in place, every component inherits consistent styling automatically. A button defined once looks right everywhere.
Step 4: Convert XD to HTML/CSS, section by section. Each page layout from the XD file is converted into semantic HTML and styled with CSS. I reference XD’s inspect mode for exact dimensions, colors, font sizes, and spacing. Responsive breakpoints are established for tablet (768px) and mobile (320px), and I test across Chrome, Safari, Firefox, and Edge as I build, not as a separate phase. Wherever the design reuses a layout pattern (testimonial cards, service blocks, team grids), I create reusable template parts so the same component deploys across pages without duplicating code.
Step 5: Make it dynamic with WordPress. Once the static HTML and CSS are solid, I wire up WordPress functionality. Navigation menus are registered with wp_nav_menu. Custom post types are created for structured content (portfolios, case studies, team members, testimonials). ACF custom fields make every section editable from the WordPress dashboard: hero headlines, service descriptions, testimonial quotes, and CTA buttons all become fields that content editors update without code. For block-based builds, custom ACF Blocks give editors a visual preview in the editor that matches the frontend.
Step 6: Create reusable components. Wherever the design uses the same layout pattern more than once, I build it as a reusable component or template part. A testimonial card used on the homepage and the about page is one component, not two copies. This keeps the codebase clean, makes updates consistent, and lets the client add more instances from the WordPress admin without calling a developer.
Best for: Complex, multi-page websites with unique layouts. Businesses that need long-term scalability. Projects where Core Web Vitals and SEO performance are critical. In our experience, custom themes with semantic HTML and ACF blocks consistently outperform page-builder sites in Lighthouse scores and search rankings
Trade-offs: Higher upfront cost ($3,000 to $15,000+ depending on complexity) and longer timeline (3 to 12 weeks). Requires experienced WordPress developers. Content editors use ACF fields or Gutenberg blocks rather than a visual drag-and-drop canvas.
Method 2: Frontend Using a Theme Builder
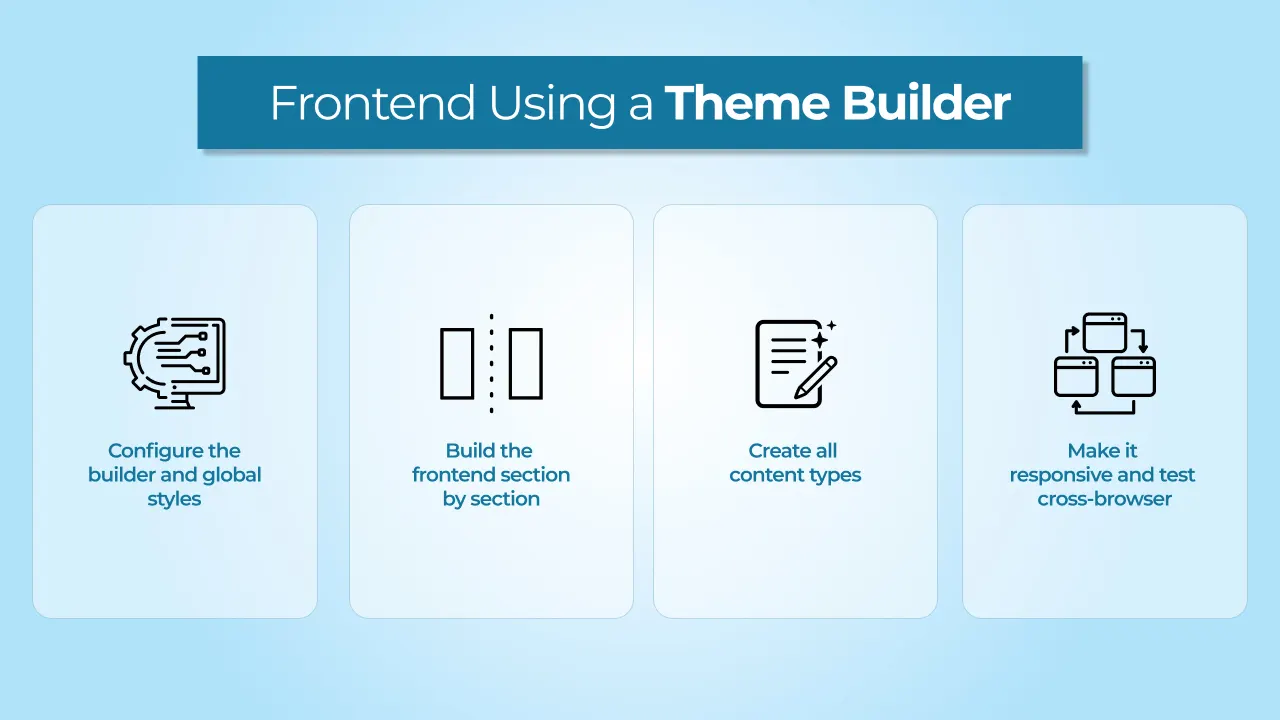
Theme builders like Elementor, Divi, Gutenberg (with a block theme), or Kadence Builder let developers recreate an XD design visually within WordPress. This is the faster, more accessible path, and it works well for the right projects.
Step 1: Configure the builder and global styles. We install the chosen builder (Elementor Pro is the most common for XD conversions) on a lightweight base theme like Hello Elementor. Before building any pages, we configure global colors, global typography, default button styles, and global spacing to match the XD design system. This step is identical in purpose to the CSS custom properties step in the custom method: get the tokens right once, and everything downstream inherits them.
Step 2: Build the frontend section by section. Using the builder’s sections, containers, rows/columns, and widget modules, we reproduce each XD artboard. Images and assets exported from XD are uploaded to the media library. Typography, colors, and spacing are matched using the builder’s global settings and per-element controls. The builder’s responsive mode lets us adjust layouts for tablet and mobile directly.
Step 3: Create all content types. Beyond static pages, we build blog listing templates, single post layouts, archive pages, 404 pages, header and footer templates, and any other content types the design calls for. Elementor’s Theme Builder feature handles these template assignments. WooCommerce product templates follow the same pattern if the project includes e-commerce.
Step 4: Make it responsive and test cross-browser. Every layout is checked at 320px, 768px, 1024px, and 1440px. Builder-generated responsive behavior often needs manual adjustment: column stacking order, mobile font sizes, hidden elements on small screens. We test across Chrome, Safari, Firefox, and Edge before sharing a staging link.
Best for: Small to mid-size websites (5 to 15 pages). Teams that want non-technical staff to edit layouts directly. Projects with tighter budgets ($700 to $2,000) or faster turnaround needs (1 to 3 weeks).
Trade-offs: Page builders add frontend overhead (extra CSS, JavaScript, and DOM elements) that can hurt page speed. Pixel-perfect fidelity often requires custom CSS overrides on top of the builder’s output. You also become dependent on the builder plugin for ongoing maintenance.
Common mistake: Trusting builder defaults for responsive
We have had clients come to us after a page builder update broke their layout. The fix required digging through layers of generated markup that a custom theme would never have produced. If you choose the builder path, budget time for responsive QA and custom CSS, not just drag-and-drop assembly.
Method 3: Block Theme with theme.json and Gutenberg
WordPress block themes represent the platform’s architectural direction. Instead of PHP template files, they use HTML templates, block patterns, and a theme.json configuration that defines the site’s entire design token system: colors, typography, spacing, and layout widths.
How it works: The developer maps XD design tokens to theme.json. Page layouts are built as block patterns using the WordPress Site Editor. Custom blocks (often ACF Blocks for speed) handle components that core blocks cannot replicate. The result gives content editors full visual control through the Site Editor while keeping the codebase lean and future-compatible.
Best for: Forward-looking projects that want to align with WordPress’s long-term roadmap. Teams that value a native editing experience without third-party plugin dependencies. Sites where design consistency needs to be enforced through a token system.
Trade-offs: The block theme ecosystem is still maturing. Developers with deep classic-theme experience face a learning curve. Some advanced layout patterns that are trivial in page builders require more creative problem-solving in the block editor.
Method 4: Automated Conversion Tools

Tools like ExportKit and Yotako parse XD files and generate HTML or WordPress theme code programmatically. They promise to skip the manual coding step entirely.
Best for: Simple, single-page designs or rapid prototyping where pixel-perfect accuracy is not essential.
Why we do not use these for client work
I have tested several of these tools. On one test, ExportKit produced a page where every element was absolutely positioned, which meant the layout shattered on any screen width other than the original artboard’s. The generated code was non-responsive, semantically weak, and nearly impossible to maintain. For any project with real-world requirements, automated tools create more cleanup work than they save.
After the Build: Optimization, SEO, and Testing
Regardless of which method you choose, every conversion project needs these steps before launch.
Image optimization: Compress and serve in WebP or AVIF. Lazy load below-the-fold images. Use descriptive alt text on every image.
SEO foundation: Proper heading hierarchy (one H1, logical H2/H3 nesting). Schema markup (Organization, BreadcrumbList, FAQPage) as JSON-LD. Clean URL structures. Meta titles and descriptions editable through Yoast or Rank Math.
Performance: Minify CSS and JavaScript. Inline critical CSS for above-the-fold content. Configure caching. Target Lighthouse scores above 90 across all four categories.
Functional and visual testing: Test at 320px, 768px, 1024px, and 1440px across Chrome, Safari, Firefox, and Edge. Run axe-core scans for WCAG accessibility issues. Verify all interactive elements, forms, and conditional logic.
Staging review: Deploy to staging. Review side by side with the original XD file. Collect feedback. Revise until the build matches the approved design. Then migrate to production.
Common Pitfalls to Avoid
Inconsistent design tokens. I recently worked on a project where the same heading color appeared as #2C2C2C, #333333, and #2E2E2E across five artboards. Three values for one color. The fix: a documented design system with named tokens applied consistently before handoff.
Font licensing gaps. A font available in Adobe Fonts may require a separate web license for a live site. We flag this in our design review phase so there are no surprises mid-build.
Ignoring content volume. Designs use curated placeholder text. Real headlines run longer, descriptions shorter, images arrive in unexpected aspect ratios. Build flexible components that handle real content gracefully.
Overlooking accessibility. Contrast ratios, focus states, keyboard navigation, and screen reader compatibility are often absent from design files but essential for the live site.
Should You Migrate to Figma Before Converting?
Only if the design still needs significant iteration or your team has already standardized on Figma for new work. If your XD files are finalized and approved, converting directly to WordPress is faster and produces the same result. There is no technical benefit to the Figma detour if the design is locked. Either path leads to the same WordPress outcome.
What to Expect: Timeline and Cost
A simple marketing site (5 to 10 pages, standard layouts) takes 2 to 4 weeks once the design is finalized. Complex sites with custom post types, integrations, or WooCommerce can take 6 to 12 weeks. Page-builder conversions typically cost $700 to $2,000. Custom theme development with ACF blocks runs $3,000 to $15,000+ depending on complexity. The biggest cost variable is not page count but the number of unique, editable components each page requires.
Post-Conversion Checklist
The checklist we run through at cmsMinds before sharing a staging link.
- Every page visually matches the approved XD design at desktop, tablet, and mobile breakpoints.
- All interactive elements function correctly across Chrome, Safari, Firefox, and Edge.
- Page load time is under 3 seconds. Lighthouse scores above 90 in all four categories.
- All content fields are editable from the WordPress admin without code changes.
- Images optimized (WebP/AVIF, lazy loaded, descriptive alt text).
- Heading hierarchy correct. Schema markup validated via Rich Results Test.
- SSL active. Sitemap and robots.txt configured. 404 page functional.
- Analytics and conversion tracking installed. Backup system tested.
Turning Design into a Living Website
The conversion method you choose should match your project’s complexity, your budget, and your content team’s technical comfort. What matters most is that the finished site honors the design, performs well for real users, and gives your team the tools to keep it current without calling a developer for every change.
When choosing a development partner, look for WordPress specialization (not general web development), design sensitivity (they notice when spacing is off by a few pixels), and a structured handoff process. Partners with Automattic Agency Partner status have demonstrated expertise and maintain direct relationships with WordPress core contributors.
If you have Adobe XD files waiting to become a WordPress website, now is the time. XD’s export features still work, but the tool is not getting new investment. A structured conversion handled by a team that understands both design intent and WordPress architecture turns static mockups into a site that works as hard as your business does.
cmsMinds is an Automattic Agency Pro Partner with 500+ WordPress projects delivered. Our frontend team converts design files from XD, Figma, and PSD into fast, responsive WordPress sites.